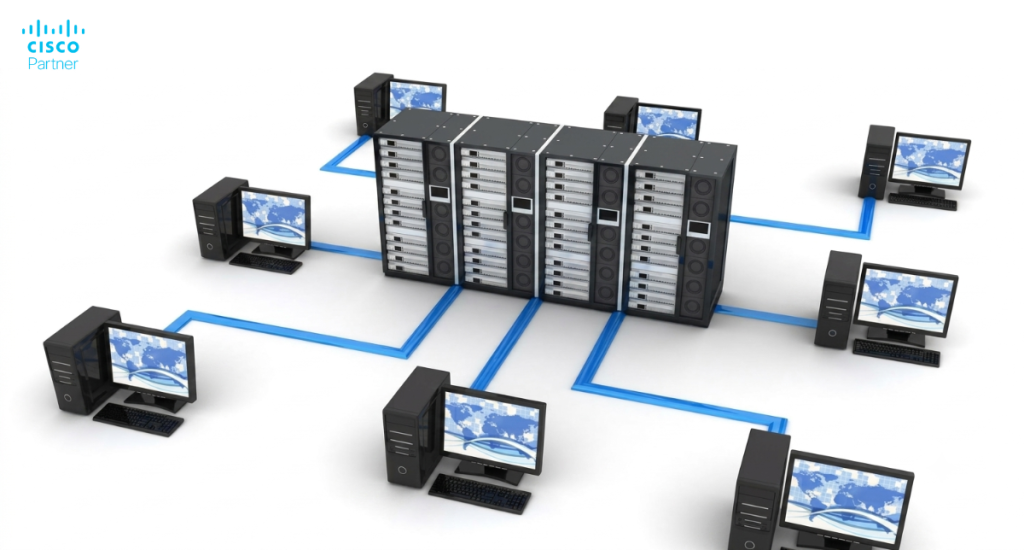
As the tech world rapidly evolves, the standard security option based on hosts and ports isn’t sufficient. In the context of Cisco Meraki networks, Cisco Meraki’s firewall accommodates the increase in modern applications, software, and mixed-use networks. Their solution provides the crucial option to customize the security process—since most applications are now web-based and need to be flexible and scalable. Cisco Meraki firewalls feature a stateful firewall, which tracks active connections and dynamically manages inbound and outbound traffic to enhance network security. Compliance is a key consideration in firewall configuration, ensuring that your network meets regulatory requirements and security best practices. Cisco Meraki firewalls also provide a centralized management dashboard for configuration and monitoring, making it easier to maintain security and compliance across your organization. Proper firewall configuration ensures that only authorized traffic passes while unauthorized access is blocked.
Article outlines: This article will guide you through logging in to the dashboard, configuring firewall rules, ensuring compliance, troubleshooting common issues (including VoIP systems), and answering frequently asked questions about Cisco Meraki firewall configuration.
Prevent potential threats from invading your network by choosing which applications are approved and which you wish to block. To get started, you’ll need to learn how to configure a Meraki firewall.
First things first, you’ll want to log into your Meraki firewall. If you don’t already have a Dashboard Account, you’ll need to create one by visiting dashboard.meraki.com and following the registration procedure. This security device is convenient because it has a centralized management dashboard, which is part of the Meraki cloud and enables cloud-based management of your network devices. You can access the firewall through the Meraki dashboard or the local status page.
After configuring your Meraki MX firewall, you must claim the device’s serial number in the Meraki dashboard to add it to your network. The serial number, found on the device’s sticker, is used for device registration and management. Administrative organizations and networks are required to house the Cisco Meraki MX firewall in the Dashboard.
Here, we’ll walk you through the process for both.
Log in to your Meraki management dashboard. Alternatively, you can log in at wired.meraki.com with your Meraki hardware IP address once it’s connected to your computer/device.
Once the Meraki MX firewall is added to your dashboard, you can navigate to the Security & SD-WAN section to create and manage firewall rules, NAT mappings, and other configurations.
There are two methods for reaching the local status page of Meraki equipment.
Note: During initial setup, if the Meraki MX firewall is configured to use dynamic IP addresses, it will automatically send a DHCP request on its internet port. This DHCP request allows the device to obtain necessary network configuration details from the upstream network, facilitating a smooth setup process.
This method should work for you if you have a valid IP address on your device. Reach the local status page using the following steps:
Connect to your device.
Go to my.meraki.com in your browser. During this process, you may need to enter or review static IP information and DNS server details provided by your ISP. For first-time local access, the default credentials are the device serial number as the username and a blank password, and you should change them immediately for security.
If the local status page fails, you can use your Meraki device’s IP address to reach it. Find the hardware IP address for your device and type it into your browser.
Let’s run through a quick setup guide for configuring the WAN port on your Meraki MX appliance.
The Cisco Meraki MX is a cloud-managed wan appliance, and its configuration primarily uses a cloud-first approach via the Meraki Dashboard. However, initial setup can be performed locally. The MX hardware automatically has its WAN interfaces configured to receive an IP address via DHCP from your ISP, and during this process, the device may communicate with a server for DHCP or other network services to obtain necessary ip information. Your specific setup or the requirements you’re working with might not allow you to use a dynamic IP assignment. If that’s the case, you’ll have to configure the IP addresses statically.
For those in that position, these are the steps to configure the Meraki MX’s WAN port using a static IP (if you’re wondering how to configure a Meraki firewall offline, this is your solution).
Connect your device to your MX’s management port.
Open your web browser and go to the device’s local status page, http://setup.meraki.com. (You won’t need any internet access since you’re connected to the device. If you’re not connected, you’ll get a message telling you to connect to a Cisco Meraki access point.)
On the top ribbon, select “Configure.”
Below “Uplink Configuration,” you’ll want to switch the “IP Assignment” to “Static” for the specific port(s) you wish to change.
Enter the static ip information and DNS server details provided by your ISP. Set the Address, Gateway, Netmask, and DNS servers values (your changes are saved automatically).
When configuring your network, it’s important to use VLANs for segmentation, which helps manage data flow between your LAN and WAN, optimizes network performance, and enhances security. The MX Security Appliance functions as a stateful firewall, only allowing inbound communication as a response to established outbound connections. By default, the MX uses a default-deny policy, so you should create firewall rules to allow only necessary traffic and deny all others. For additional security, set IP Source Address Spoofing Protection to “Block” to mitigate spoofing attempts.
Using templates in the Meraki Dashboard can help ensure consistent security policies across multiple locations. Note that Cisco Meraki firewalls do not use Application-Level Gateways (ALGs), which simplifies configuration. The MX also has a UDP timer function with a default timeout of 300 seconds, which cannot be adjusted.
Now, you’re good to go. If you have additional questions, contact Stratus Information Systems. Our expert team is available for all your Cisco Meraki hardware needs.
You aren’t new to this scene by any means, and you likely already know why you want (or already have) a Cisco Meraki MX. If you’re still on the fence or doing your research, here’s a quick overview of some of the benefits you’ll get from a Meraki firewall:
Meraki devices include security appliances (such as the MX series), switches, and wireless access points, all managed centrally through a cloud-managed dashboard.
Industry-best encryption security
Identity-based firewall
Automatic VPN
SD-WAN for optimizing network performance and security across multiple sites
Integrated intrusion detection and prevention (IDS/IPS) with cloud-delivered threat intelligence
Advanced Malware Protection (AMP) to scan and inspect file downloads for malware
Layer 3 and Layer 7 outbound firewall rules for granular traffic management
Traffic shaping to prioritize critical applications like VoIP and ensure quality of service
Content filtering to block categories of risky or inappropriate websites
Central management dashboard for unified visibility and control
Application control and visibility
Ability to enable email or chat alerts for configuration changes and security events
Option to set automatic security list updates to ‘Hourly’ and perform periodic vulnerability scans to maintain a strong security posture
Keep in mind that enabling additional features such as intrusion detection, AMP, and content filtering can impact performance due to increased resource utilization. Setting IDS/IPS to “Prevention” mode blocks malicious traffic in real-time, further enhancing your network’s security.
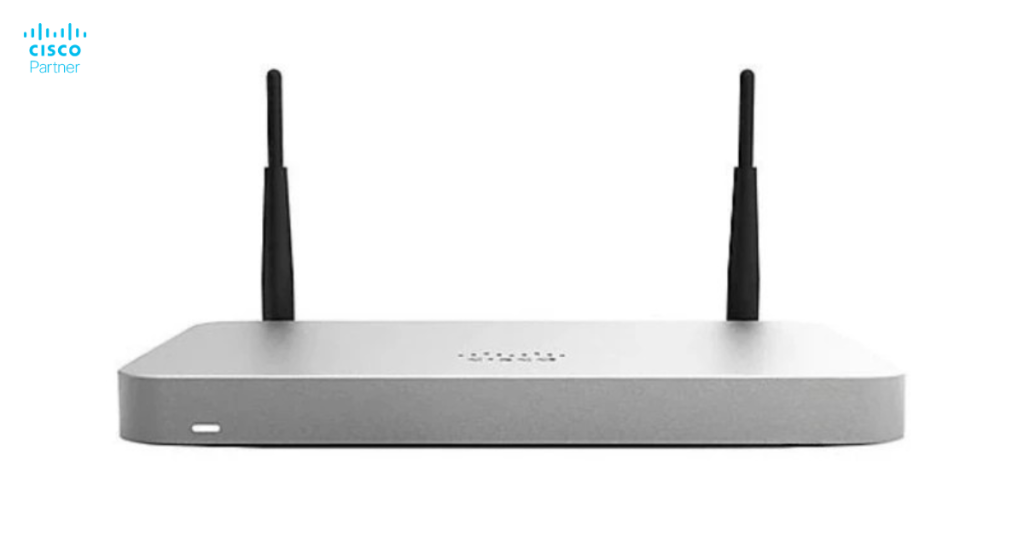
The difference between a Meraki firewall and a router comes down to licensing. If an Advanced Security license is paired with the device, then it is a firewall. However, it’s just a router if an Enterprise license is used.
Routing is a core function of both routers and firewalls, enabling the movement of data between networks. However, firewalls add security features such as the ability to create layer 3 firewall rules, which control inbound and outbound traffic based on protocol, port numbers, TCP, and UDP traffic. Meraki firewalls utilize both Layer 3 and Layer 7 rules to manage and secure traffic flow, including the use of Layer 7 traffic analysis to block specific web-based services without needing IP addresses.
Firewall rules on Meraki devices define how inbound and outbound traffic flows across the network, but these rules only apply to traffic passing through the firewall—not to traffic originating from or terminating at the firewall itself. NAT rules are also important for managing inbound and outbound traffic, allowing for port forwarding and NAT mappings to facilitate communication between internal and external networks, such as for VoIP or application-specific needs.
When configuring site-to-site VPNs, determining the VPN mode—such as VPN concentrator mode—is critical, as it impacts which configuration options are available (for example, some inbound firewall settings are managed differently or disabled in this mode). Meraki firewalls also support Geo-IP based firewalling rules to block traffic based on destination country, further enhancing security.
For additional security, it is recommended to limit administrative access to the Meraki dashboard by IP address and regularly audit permissions.
The short answer is: Yes, the Meraki MX Security Appliance is a firewall. The MX Security Appliance functions as a stateful firewall, allowing inbound communication only as a response to established outbound connections. Cisco Meraki firewalls are the best-in-class option for those looking for a powerful, customizable, identity-based security solution.
Ensuring your Cisco Meraki firewall is running smoothly is crucial for maintaining optimal security and uninterrupted network performance. When issues arise, the Meraki dashboard serves as your central hub for diagnosing and resolving problems related to firewall rules, inbound and outbound traffic, and port forwarding rules.
Start by logging into the Meraki dashboard and reviewing any error messages or alerts that may indicate issues with your firewall settings, and check whether your devices are sending syslog messages to a centralized server for logging and monitoring. Pay close attention to notifications about blocked traffic, misconfigured firewall rules, or failed port forwarding attempts. The dashboard’s intuitive interface allows you to quickly identify which rules are affecting your network’s traffic flow.
Next, review your firewall rules to ensure they are correctly configured for both inbound and outbound traffic. Check the sequence of your rules, as the first rule that matches the traffic will be applied—subsequent rules may not take effect if the order is incorrect. Make sure that your port forwarding rules are set up to allow necessary services and that the correct ports and IP addresses are specified. 1:Many NAT (many nat) can be used when a single public IP must map to multiple LAN IPs through port forwarding rules.
If you’re experiencing issues with specific applications or services, verify that the relevant ports are open and that your firewall rules are not inadvertently blocking required traffic. For example, ensure that port forwarding is properly configured for services like VPN traffic, DNS traffic, or voice VLANs.
Finally, use the Meraki dashboard’s monitoring tools to track real-time traffic and identify any unusual patterns that could indicate a misconfiguration or potential security threat. When investigating recurring firewall issues, review syslog messages alongside dashboard monitoring. By systematically reviewing your firewall settings and leveraging the dashboard’s diagnostic features, you can quickly resolve common issues and keep your network secure.
If you encounter persistent problems or need expert assistance, the team at Stratus Info Systems is always available to help you optimize your Cisco Meraki firewall for maximum security and performance.
You can think of Stratus Information Systems as your Cisco Meraki experts. Our team has the extensive knowledge, experience, and expertise you need in a partner for Cisco Meraki networks. Meraki support and consulting services can help manage your network whenever you need us, including troubleshooting by reviewing NAT rules, firewall rules, DNS settings, and routing consistency. We also help clients achieve compliance by ensuring firewall configurations and security policies meet regulatory requirements and best practices. We’ll offer as much help as you’re looking for, no more, no less.
Get in touch today to learn more about what Stratus can do for you.

Continue Reading...